Customizing a WooCommerce store usually means digging through theme files, writing custom CSS, or paying a developer for small visual tweaks. However, a new free plugin called Dewebkiller Store Style Customizer for WooCommerce changes that. It brings the most common style controls directly into the WordPress dashboard, so store owners can update their storefront design in minutes, not hours.
This post breaks down what the plugin does, why it matters for store owners, and how to start using it today.

A WooCommerce store style customizer is a tool that lets store owners adjust visual elements such as colors, buttons, fonts, and badges directly from the WordPress admin area, without editing theme files or writing CSS. Instead of relying on a developer for every small design change, store owners can make updates themselves and see the results instantly.
The Dewebkiller Store Style Customizer plugin is one such tool. It adds a dedicated settings tab inside WooCommerce, so the entire styling workflow stays in one familiar place.
You might me interested as well: Page Builders vs Custom Code: Which is Best for Your WordPress Site?
Most WooCommerce stores don’t need a complete theme overhaul. Instead, store owners usually just want their buttons, badges, and fonts to match their brand. Unfortunately, WooCommerce’s default styling lives deep inside template CSS, which isn’t easy to override safely without development knowledge.
As a result, even a simple request like changing a button color to match a logo often turns into a custom CSS project. Therefore, this plugin solves that exact problem by centralizing the most requested style changes into a single, beginner-friendly settings panel.
The plugin adds a new Style Switcher tab inside WooCommerce → Settings. From there, store owners can control the following elements:
Because every setting updates live, store owners can experiment freely and only save the changes they actually like.
The latest update focuses heavily on sale badge styling. Store owners can now fully customize how “Sale” labels appear on product cards, including background color, border, text color, hover background, hover text color, font size, and font weight.
In addition, this release fixes several administrative layout issues, including table boundary problems inside the settings screen. The color swatches were also redesigned, replacing the default circular pickers with a more premium rectangular preview style.

Getting started takes just a few steps:
/wp-content/plugins/, or install it directly through the WordPress Plugin Directory.To reset the store back to its default appearance, simply delete the saved values or reset them manually inside the settings panel.
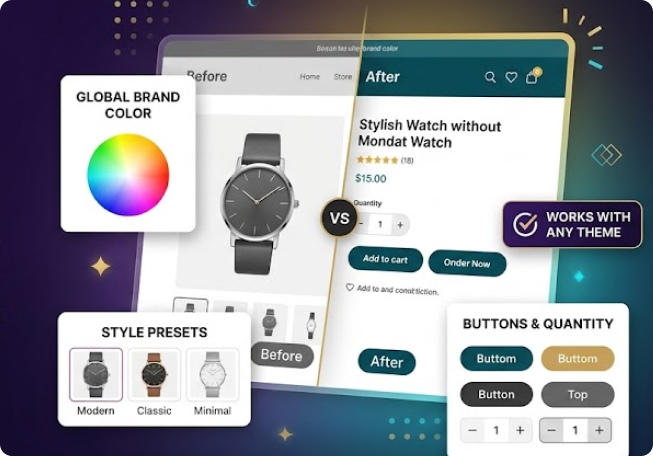
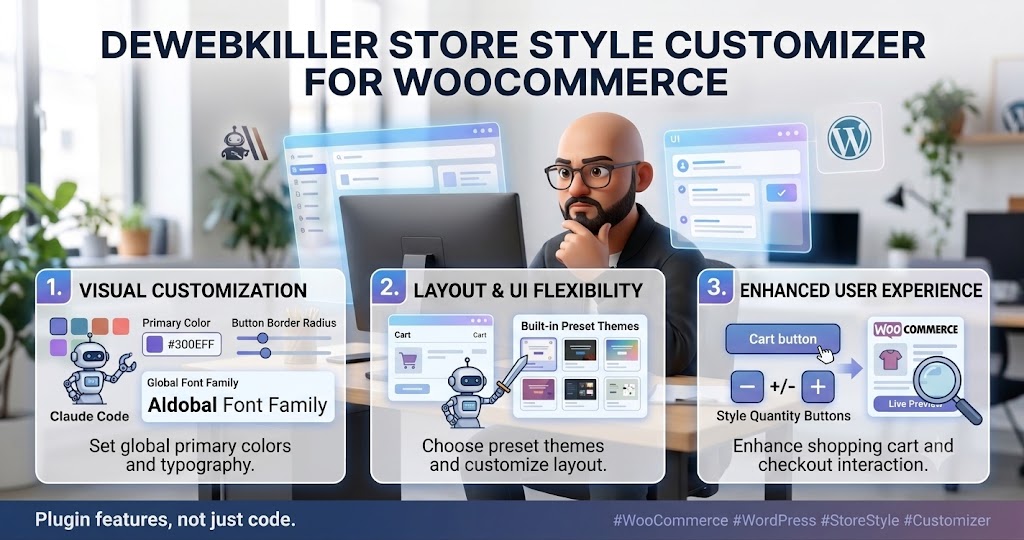
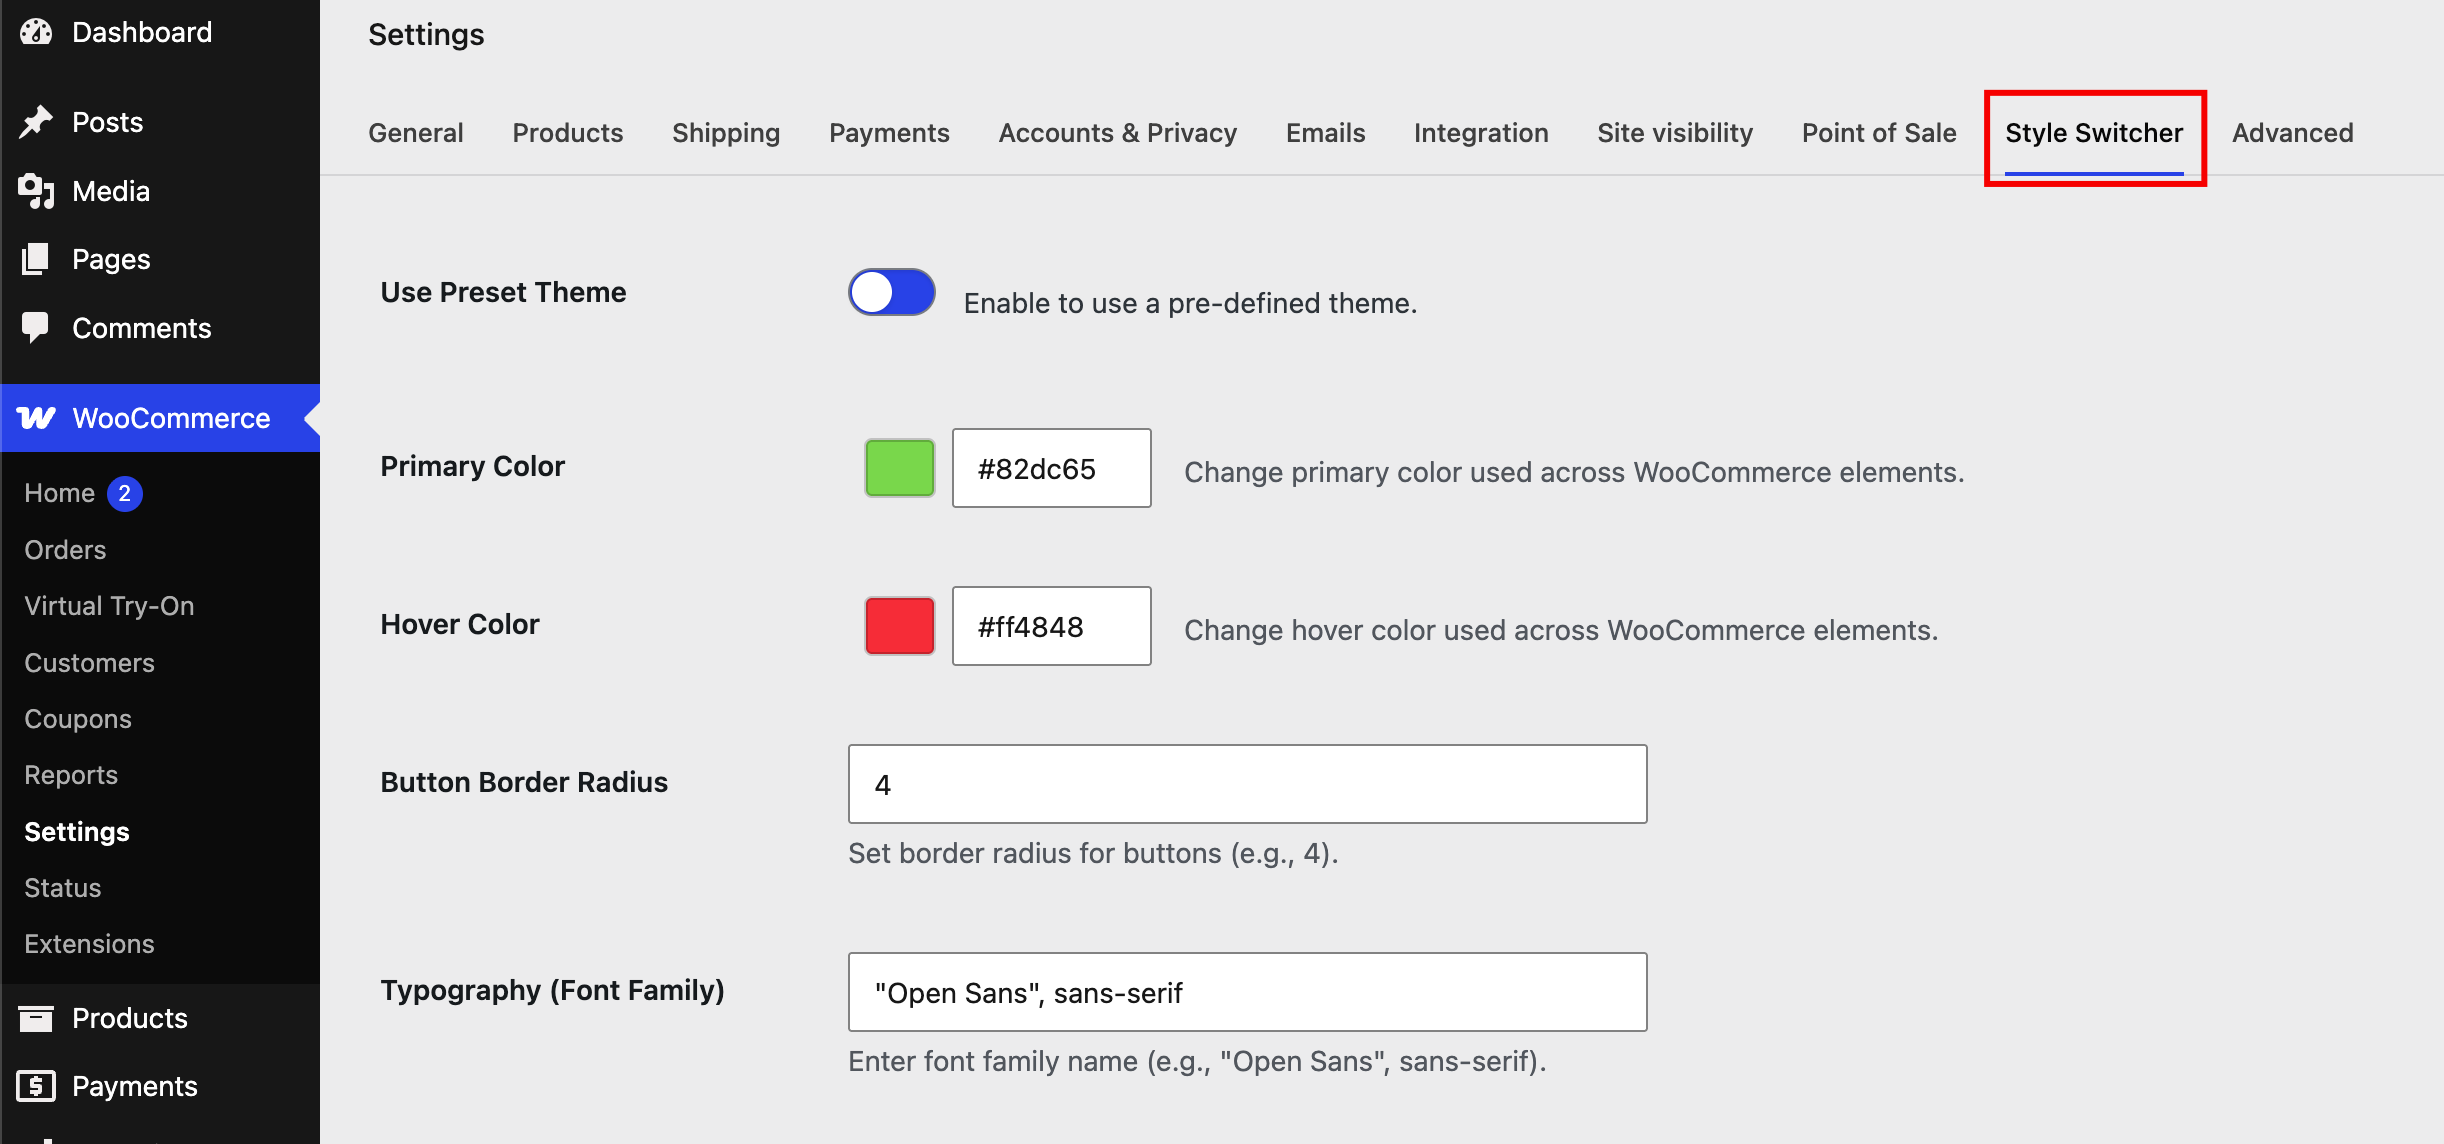
Go to WooCommerce → Settings → Style Switcher inside the WordPress dashboard. All customization options appear in that single tab.
Yes. The plugin works with most themes that use standard WooCommerce templates, since it targets WooCommerce’s core styling elements rather than theme-specific code.
Yes. Store owners can reset the plugin by deleting the saved values or manually restoring the default settings inside the Style Switcher panel.
No. Every option is controlled through the WordPress dashboard, and changes appear instantly through the live preview, so no CSS or code editing is required.
The plugin requires WordPress 6.0 or higher and PHP 8.0 or higher, and it has been tested up to WordPress 7.0.
For store owners who want a branded, polished WooCommerce storefront without hiring a developer for every small change, this plugin offers a practical solution. It bundles the most requested style controls — colors, buttons, fonts, and sale badges — into one simple settings screen, backed by a live preview that removes the guesswork.
The plugin is available for free on the official WordPress Plugin Directory, where store owners can download it, browse the source code, or follow ongoing updates.